Quick Answer
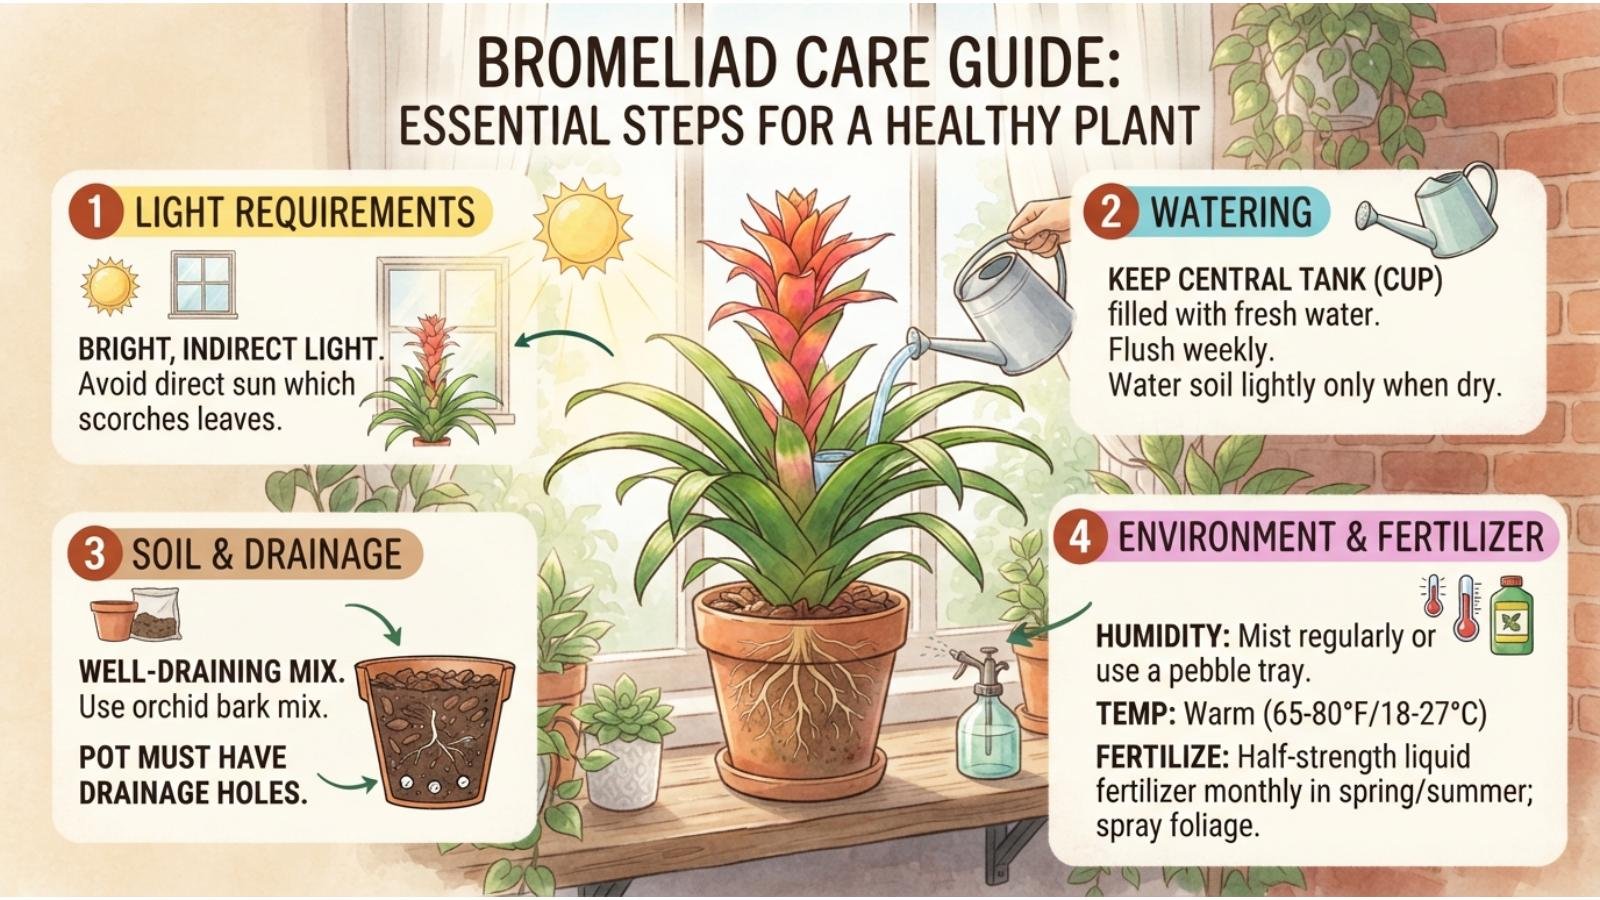
Bromeliad plant care is relatively simple when you provide bright, indirect light, excellent drainage, moderate humidity, and careful watering. Many popular bromeliads form a central cup that can hold water, while their roots mainly anchor the plant. Keep the growing medium from staying soggy, flush the central cup regularly, use weak fertilizer during active growth, and give pups time to develop after the mother plant flowers.
Introduction
Bromeliads are among the most rewarding tropical houseplants because their architectural leaves and colorful flower spikes can create a dramatic display without requiring complicated daily care. However, they are different from many ordinary houseplants. Treating a bromeliad like a typical moisture-loving foliage plant can lead to one of its biggest problems: root rot.
The key to successful bromeliad plant care is understanding how the plant naturally collects water. Many popular bromeliads have overlapping leaves that form a central reservoir, or tank. Their roots often have a more limited role than the roots of conventional houseplants, so the right balance of light, airflow, water, and drainage matters more than simply watering frequently.
What Is a Bromeliad?
Bromeliads belong to the Bromeliaceae family, a large group that includes both terrestrial plants and epiphytic species. Many popular indoor varieties, including Aechmea, Guzmania, Neoregelia, and Vriesea, are adapted to growing above the ground or in very loose organic material.


A common misconception is that every bromeliad should be cared for in exactly the same way. They do not all have identical light, watering, or temperature requirements.
For example:
- Aechmea generally handles bright filtered light well.
- Guzmania often performs well indoors with bright, indirect light.
- Neoregelia can develop stronger foliage coloration with suitable bright light.
- Tillandsia species, commonly called air plants, have very different watering requirements because they are grown without conventional soil.
- Cryptanthus is more terrestrial and should not be treated exactly like a tank-forming bromeliad.
Practical takeaway: identify the genus or species whenever possible. The plant’s natural growth habit is often the best clue to its care requirements.
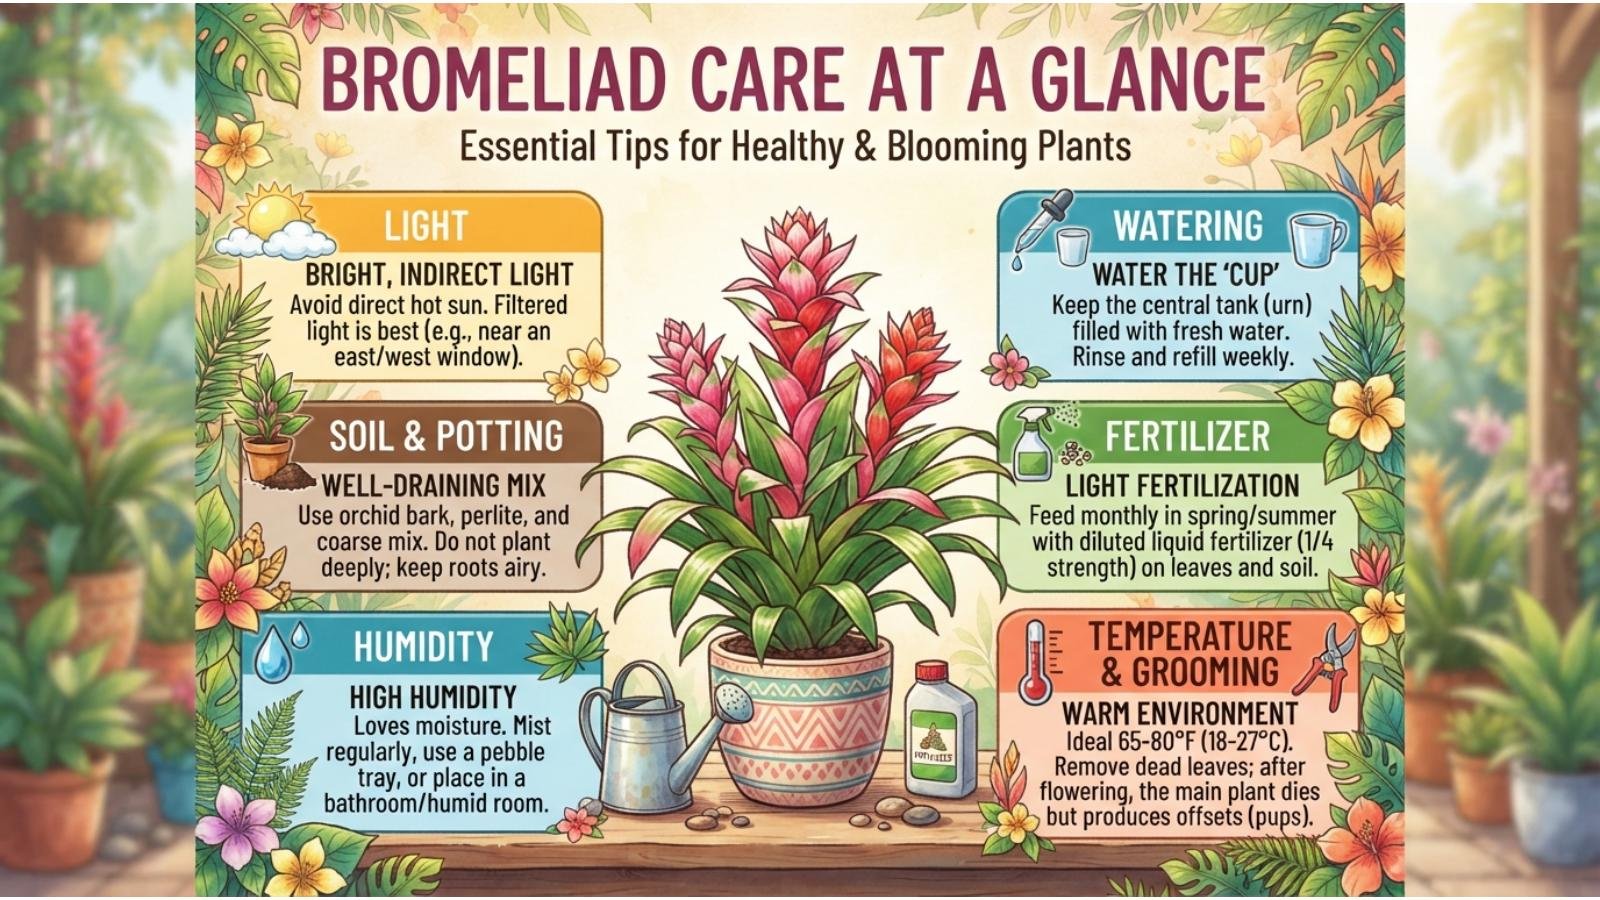
Bromeliad Care at a Glance
| Care factor | General recommendation |
|---|---|
| Light | Bright, filtered or indirect light for many indoor varieties |
| Water | Keep the central cup appropriately supplied and avoid constantly soggy roots |
| Humidity | Moderate to high humidity is beneficial |
| Temperature | Warm, stable household conditions suit most popular varieties |
| Soil | Loose, porous, fast-draining mix |
| Fertilizer | Weak fertilizer during active growth |
| Pot | Small, well-draining container appropriate to the root system |
| Repotting | Usually infrequent because many bromeliads have small root systems |
| Propagation | Primarily through pups or offsets |
| Main risk | Root rot from excessive moisture and poor drainage |
Individual species can differ substantially, so use this table as a starting point rather than a rigid schedule.
How Much Light Do Bromeliads Need?
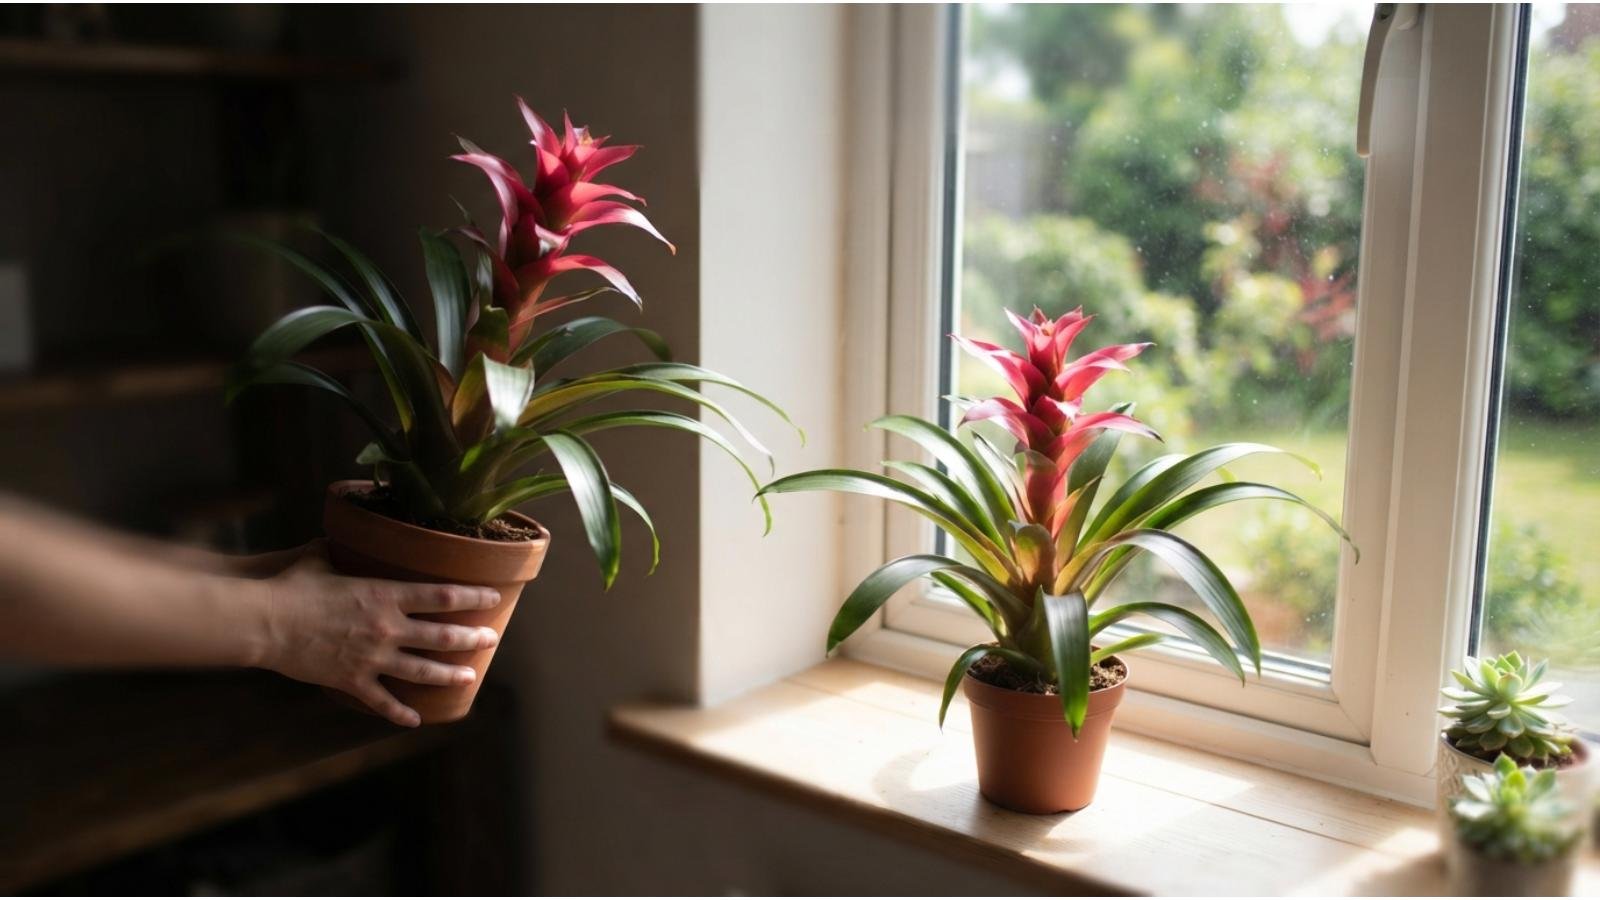
Most indoor bromeliads grow best in bright, filtered or indirect light. They can survive lower-light conditions for a period, but survival is different from vigorous growth and good flowering.
Place your bromeliad near a bright window while protecting it from prolonged, intense afternoon sun if the species is not adapted to strong light.
Signs your bromeliad needs more light
You may notice:
- Dark green, soft or stretched foliage.
- Slow growth.
- Poor or delayed flowering.
- Less attractive natural coloration.
Signs of excessive light
Watch for:
- Bleached-looking leaves.
- Yellowing or unusually pale foliage.
- Brown or scorched areas.
- Shorter, thicker leaves in some varieties.
the bromeliads can show visible changes when light is unsuitable, making the plant itself a useful indicator.
Expert tip: If you move a bromeliad from a dim room to a much brighter location, increase light gradually instead of exposing it suddenly to intense sunlight.
Image Suggestion: A visual showing healthy bromeliad foliage under suitable indirect light compared with bleached leaves from excessive sun.
How to Water a Bromeliad Correctly
Watering is where many new bromeliad owners make mistakes.
If your bromeliad has a tank-forming rosette, the central cup can hold water. However, keeping the potting mix permanently wet is a different matter and can encourage root problems.
A simple watering routine
- Check the plant’s central cup if it is a tank-forming species.
- Use clean water to refresh the cup when necessary.
- Periodically flush the cup with fresh water.
- Allow excess water to drain freely.
- Check the potting medium before watering the roots again.
- Never allow the container to sit in standing water.
The exact watering frequency depends on temperature, light, humidity, pot size, growing medium, and species. Extension guidance commonly emphasizes allowing the growing medium to drain well and avoiding saturated roots.
Why flushing the cup matters
Water sitting in a bromeliad’s reservoir can accumulate mineral salts over time, particularly when household water contains significant dissolved minerals.
Periodic flushing helps remove accumulated material and refreshes the reservoir.
Should you use tap water?
Many bromeliads tolerate ordinary tap water, but water quality matters.
If your water is heavily mineralized, softened with sodium, or leaves substantial deposits, rainwater or suitable filtered/distilled water may be preferable for sensitive varieties. Wisconsin Extension specifically warns against softened water because of its sodium content.
Important: Do not assume that more water means faster growth. With bromeliads, excessive moisture around the roots can create the exact conditions that cause decline.
What Soil Is Best for Bromeliads?
Bromeliads generally need a loose, porous, fast-draining growing medium.
A heavy garden soil that stays wet for days is usually a poor choice for epiphytic bromeliads.
A suitable commercial option is often an orchid-style or bromeliad potting mix containing materials such as:
- Fine or medium orchid bark.
- Perlite.
- Coarse organic material.
- Other components that create air spaces.
Wisconsin Extension recommends an acidic, moisture-retentive but fast-draining medium and notes that ordinary dense soil can encourage root problems.
Why drainage is so important
Most popular epiphytic bromeliads have relatively limited root systems. Their roots primarily provide anchorage, while the leaves and central tank play important roles in water and nutrient acquisition.
That means a large pot filled with wet soil is usually more dangerous than helpful.
Rule of thumb: the growing medium should hold enough moisture to support the plant but contain plenty of air spaces so it does not remain saturated.
Choosing the Right Pot
A bromeliad does not necessarily need a large container simply because the plant has large leaves.
In fact, an oversized pot can hold excess moisture around a relatively small root system.
Choose a container that:
- Has drainage holes.
- Fits the current root system.
- Provides enough stability for the plant.
- Does not remain wet for excessively long periods.
If a top-heavy bromeliad needs more stability, you can use a decorative outer container around the appropriately sized growing pot rather than placing the plant directly into an unnecessarily large pot.
Humidity and Air Circulation
Most tropical bromeliads appreciate moderate to high humidity, especially when grown in warm conditions.
However, humidity should not be confused with constantly wet roots.
A plant can enjoy humid air while still suffering from root rot if the potting medium remains saturated.
Improving indoor humidity
Depending on your environment, you can:
- Group plants together.
- Use a humidifier.
- Keep the plant away from very dry heating or cooling airflow.
- Maintain good air circulation around the foliage.
Repeated misting is not a substitute for overall humidity management, and excessive moisture sitting on foliage can sometimes encourage disease.
Practical observation: a warm, humid room with stagnant air can still create problems. Gentle air movement is useful because it helps wet foliage dry naturally.
Ideal Temperature for Bromeliads
Most commonly grown tropical bromeliads prefer warm household temperatures.
Avoid placing them:
- Directly beside cold windows during winter.
- Against heating vents.
- Directly in strong air-conditioning drafts.
- Outdoors where unexpected frost can occur.
Different genera have different tolerance levels, so species-specific information is valuable.
For many indoor bromeliads, ordinary comfortable household temperatures work well as long as sudden extremes are avoided.
How to Fertilize Bromeliads
Bromeliads generally require less fertilizer than many fast-growing houseplants.
During active growth, use a diluted, balanced or bromeliad-appropriate fertilizer according to the product label and the requirements of your particular species.
Extension recommendations commonly favor weak fertilizer applications rather than heavy feeding.
Avoid fertilizer buildup
Overfertilization can cause:
- Salt accumulation.
- Leaf-tip damage.
- Poor plant form.
- Excessively lush growth.
- Reduced ornamental quality.
One important point is that fertilizer should not automatically be poured into the central tank. UF/IFAS specifically recommends applying diluted fertilizer to the potting medium rather than routinely adding fertilizer to the center cup because concentrated salts can damage developing foliage.
Beginner mistake: assuming a colorful bromeliad needs more fertilizer to stay colorful. Light is often much more important to maintaining attractive coloration.
Do Bromeliads Need Pruning?
Usually, bromeliads require very little pruning.
Remove:
- Completely dead leaves.
- Damaged foliage that is no longer useful.
- Spent flower structures when appropriate.
- Dead material accumulating around the plant.
Use clean, sharp scissors and avoid cutting healthy leaves unnecessarily.
If only the tips are brown, investigate the cause before removing large sections of otherwise healthy foliage. Common contributing factors include dry air, mineral buildup, inconsistent watering, or environmental stress.
Why Is My Bromeliad Turning Brown?
Brown leaves do not automatically mean the plant is dying.
Look at the location and pattern of the damage.
Brown leaf tips
Possible causes include:
- Mineral buildup.
- Dry conditions.
- Water stress.
- Excess fertilizer.
- Environmental stress.
Brown or bleached patches
These can indicate excessive sunlight or heat exposure.
Brown, soft leaves near the base
This is more concerning because consistently wet conditions can contribute to rot.
Brown leaves after flowering
This may be part of the plant’s natural life cycle. Many popular bromeliads are monocarpic: after flowering, the mother plant gradually declines while producing offsets or pups.
Image Suggestion: Close-up diagnostic chart showing brown tips, sun damage, rot, and natural post-flowering decline.
Why Is My Bromeliad Not Flowering?
Flowering depends on several factors, including:
- Plant maturity.
- Light intensity.
- Day length.
- Temperature.
- Species.
- Overall growing conditions.
A bromeliad sitting in very low light may remain alive without having enough energy for strong growth or flowering.
Before trying to force flowering, first make sure the plant is healthy.
Improve the basics first
- Give it appropriate bright light.
- Avoid chronic overwatering.
- Maintain suitable temperatures.
- Avoid excessive fertilizer.
- Identify the species if possible.
Some bromeliads can be induced to flower using controlled ethylene exposure, but this is more specialized than normal home care.
What Happens After a Bromeliad Flowers?
This surprises many first-time growers.
For numerous popular bromeliads, the mother plant gradually declines after flowering. That does not mean you failed.
Before and during this decline, the plant often produces pups, or offsets, around its base. These young plants eventually become the next generation.
This is a normal part of the bromeliad’s growth cycle.
What should you do?
Keep caring for the mother plant while the pups develop.
Do not rush to remove small offsets.
Wait until pups are sufficiently developed and have a reasonable size and root structure before separating them.
How to Propagate Bromeliads From Pups
Propagation through pups is one of the easiest ways to create new bromeliad plants.
Step-by-step
- Allow the pup to grow while attached to the mother plant.
- Wait until it has developed into a substantial young plant.
- Carefully remove it from the mother plant using a clean, sharp blade.
- Pot it in a small container with a loose, fast-draining medium.
- Keep it in appropriate light.
- Avoid keeping the new potting medium saturated.
- Continue normal bromeliad care while the pup establishes.
UF/IFAS recommends separating pups when they have reached approximately half the size of the parent plant.
Practical tip: Very small pups are easy to damage. Patience usually produces better results than separating every offset as soon as it appears.
Common Bromeliad Plant Care Mistakes
1. Keeping the soil constantly wet
This is one of the most important mistakes to avoid.
Bromeliads may appreciate water in their natural tank, but that does not mean their roots should sit in saturated soil.
2. Using a heavy potting mix
Dense soil reduces air around the roots and dries slowly.
3. Giving intense sunlight too quickly
A plant adapted to filtered light can develop bleaching or scorching when suddenly moved into strong direct sun.
4. Overfertilizing
More fertilizer does not necessarily produce a healthier bromeliad.
5. Using softened water
Sodium-containing softened water can create problems over time.
6. Ignoring the central cup
Minerals and stagnant water can accumulate in tank-forming varieties.
7. Throwing away the plant after flowering
The declining mother plant may be producing pups that can become healthy new plants.
8. Treating every bromeliad identically
This is perhaps the biggest conceptual mistake. A terrestrial bromeliad, tank-forming Aechmea, and air plant can have substantially different requirements.
Bromeliad Care by Season
Spring
Spring is an excellent time to:
- Increase watering as growth resumes.
- Resume light fertilization if appropriate.
- Check for pups.
- Repot only when genuinely necessary.
- Gradually increase light exposure.
Summer
Watch plants more closely during hot weather.
Higher temperatures can increase water loss, but this does not mean the roots should remain permanently wet. Good airflow becomes increasingly important as temperatures rise.
Fall
As light levels decline:
- Reduce fertilizer.
- Monitor watering carefully.
- Check for drafts.
- Inspect plants for pests before moving outdoor plants indoors.
Winter
Indoor bromeliads usually grow more slowly in low light.
Avoid responding to slower growth by adding extra fertilizer or keeping the soil constantly wet. Low light plus excessive moisture is an especially poor combination.
Can Bromeliads Grow Outdoors?
Yes, but outdoor suitability depends heavily on the species and local climate.
Many bromeliads are tropical or subtropical and perform particularly well in warm, humid conditions. Others can tolerate brighter or cooler environments.
When moving an indoor bromeliad outside:
- Start in bright shade or filtered light.
- Gradually expose it to stronger light if the species permits.
- Protect it from extreme heat or cold.
- Monitor rainfall so the pot does not remain saturated.
- Bring cold-sensitive varieties indoors before frost.
Some bromeliads can also be mounted on suitable wood or other supports, especially species adapted to epiphytic growth.
Bromeliad Pests and Problems
Bromeliads are generally considered relatively low-maintenance, but pests can still appear.
Potential problems include:
- Mealybugs.
- Scale.
- Aphids.
- Fungal or bacterial problems associated with excessive moisture.
- Root rot.
Inspect the leaf bases, undersides of leaves, and central rosette when checking the plant.
Early detection is much easier than trying to rescue a severely infested or rotting plant.
A Simple Weekly Bromeliad Care Routine
Instead of following a rigid watering calendar, use a quick weekly inspection.
Check these five things:
1. Light:
Is the plant receiving enough bright light without obvious scorching?
2. Cup:
If it is a tank-forming bromeliad, does the central reservoir need refreshing?
3. Soil:
Is the growing medium appropriately moist rather than saturated?
4. Leaves:
Look for pests, browning, bleaching, or unusual softness.
5. Pups:
Check the base for new offsets.
This approach is more reliable than blindly watering every Sunday because indoor conditions change throughout the year.
Bromeliad Care: What Experienced Growers Watch First
When diagnosing a struggling bromeliad, don’t immediately reach for fertilizer.
Look at the environment in this order:
- Light
- Drainage
- Water quality and watering habits
- Temperature
- Humidity and airflow
- Fertilizer
- Pests
This order matters because environmental problems are often mistaken for nutrient deficiencies.
For example, a pale bromeliad in an unsuitable location does not necessarily need more fertilizer. Increasing fertilizer without fixing the light can make the situation worse.
Frequently Asked Questions
How often should I water a bromeliad?
There is no universal schedule because watering depends on species and growing conditions. Check the central cup of tank-forming varieties and keep the potting medium from remaining constantly saturated. Periodically flush the cup with fresh water.
Should I water the soil or the bromeliad cup?
For tank-forming bromeliads, the central cup can hold water, while the potting medium should remain well drained. Some species have different requirements, so identifying the plant is important.
Do bromeliads like direct sunlight?
Some bromeliads tolerate substantial sunlight, while others prefer filtered light. Many indoor varieties perform best in bright, diffused light. Sudden exposure to intense sun can cause damage.
Why is my bromeliad dying after flowering?
For many bromeliads, gradual decline after flowering is a normal part of their life cycle. Look for pups developing around the base; these can become replacement plants.
How long do bromeliads live?
The lifespan varies considerably by genus and species. A mother plant may gradually decline after flowering while producing pups, allowing the plant to continue through offsets.
Can I grow a bromeliad without soil?
Yes. Many epiphytic bromeliads can be mounted on suitable supports, although mounted plants generally require more attention to humidity and watering than conventionally potted plants.
Do bromeliads need fertilizer?
They generally need only light feeding, particularly when actively growing. Excess fertilizer can damage plants and cause salt accumulation, so diluted applications are preferable.
Why are my bromeliad leaves turning yellow?
Yellowing can have several causes, including excessive light, aging foliage, watering problems, or environmental stress. Look at the entire plant rather than treating yellow leaves as proof of a single problem.
Can bromeliads grow indoors?
Yes. Many popular bromeliads are excellent indoor plants when given appropriate light, drainage, watering, and temperature.
Should I mist my bromeliad?
Humidity can benefit tropical bromeliads, but frequent misting is not a replacement for suitable environmental humidity. Good airflow is also important, particularly in warm conditions.
Final Bromeliad Plant Care Checklist
Before considering your bromeliad setup complete, make sure you can answer yes to most of these:
- It receives appropriate bright light.
- The plant is protected from unsuitable intense sunlight.
- The pot has drainage.
- The growing medium is loose and porous.
- Roots are not sitting in stagnant water.
- The central cup is refreshed periodically if the species forms one.
- Water quality is suitable.
- Fertilizer is used sparingly during active growth.
- Humidity is reasonable for the species.
- Air circulation is adequate.
- Pups are left attached until sufficiently developed.
- You know whether your particular bromeliad is an epiphyte or terrestrial species.
Conclusion
Successful bromeliad plant care is less about maintaining a complicated schedule and more about understanding how the plant is built. Give it the right amount of light, provide excellent drainage, manage water carefully, avoid excessive fertilizer, and pay attention to the difference between a healthy central water reservoir and waterlogged roots.
Most importantly, don’t panic when a mature bromeliad eventually declines after flowering. For many types, that decline is part of the natural life cycle, and the pups growing around the base are your opportunity to continue the plant’s display for years to come.