Quick Answer
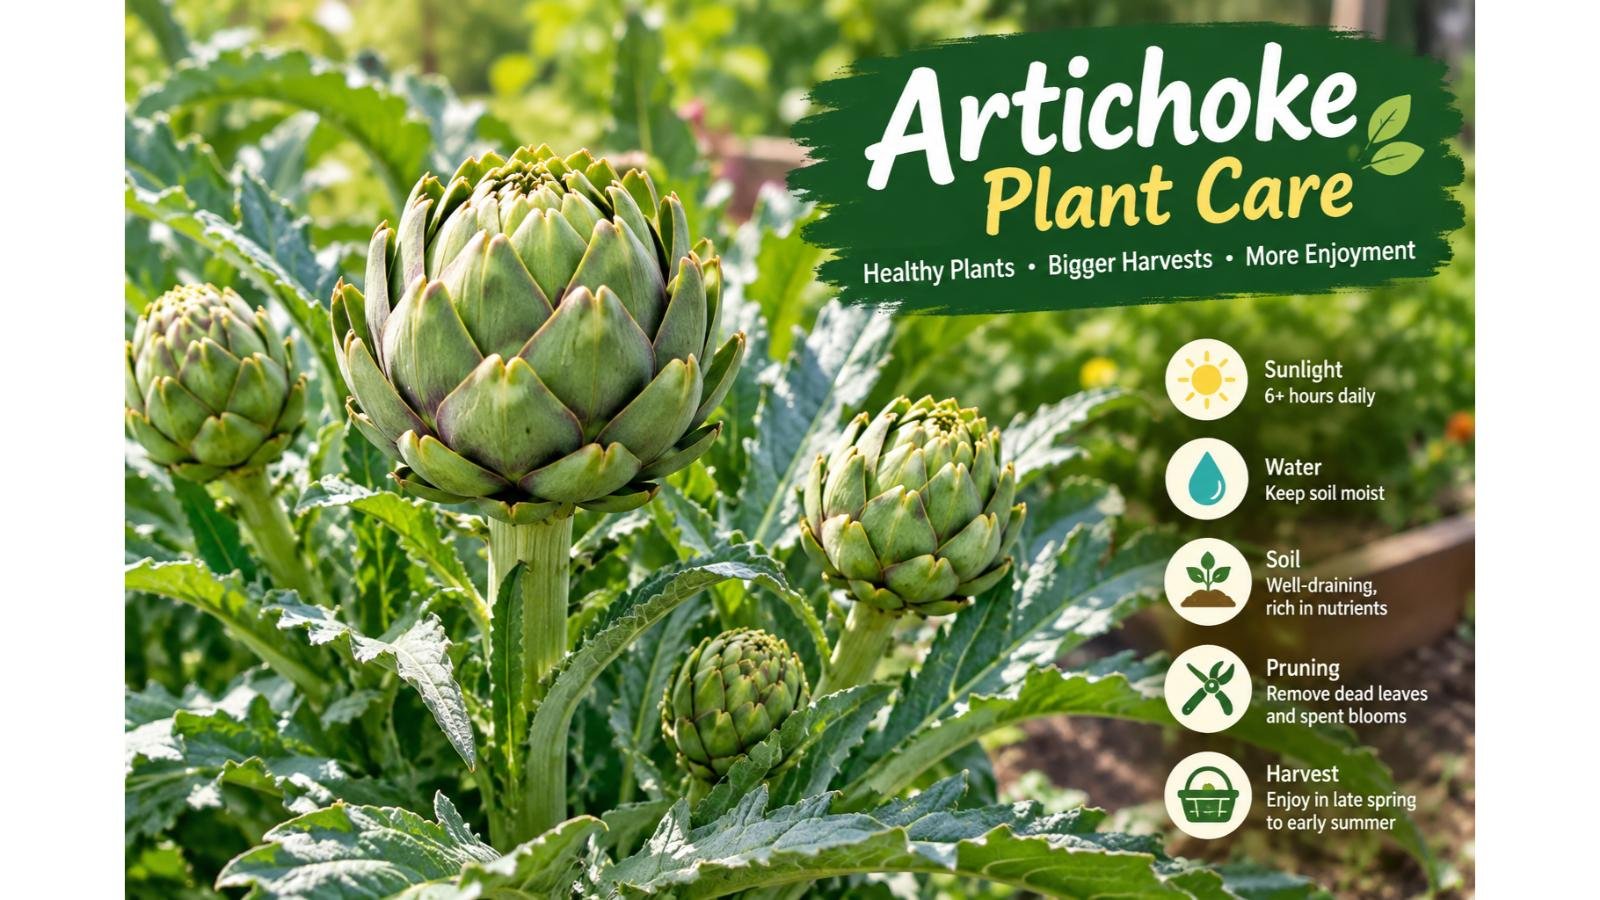
Artichoke plant care involves providing at least 6–8 hours of direct sunlight, fertile and well-draining soil, consistent moisture, and enough space for the plant’s large leaves.
Artichokes grow best in mild weather, with cool winters and moderate summers. Water deeply when the soil begins to dry, feed regularly during active growth, and protect plants from extreme heat or freezing temperatures. With proper care, artichokes can produce delicious edible flower buds.
Introduction
Growing artichokes at home can be incredibly rewarding. Their dramatic, silvery-green foliage makes them attractive ornamental plants, while their edible flower buds provide a delicious harvest for the kitchen.
However, artichokes need more space, consistent moisture, and careful temperature management than many ordinary garden vegetables. A plant that looks healthy may still produce disappointing harvests if it receives too little sunlight, experiences irregular watering, or grows in unsuitable weather.
Understanding artichoke plant care helps you grow stronger plants, encourage larger flower buds, and avoid common problems such as poor growth, premature flowering, and small or tough artichokes.
This guide explains how to choose the right growing location, prepare the soil, water and fertilize correctly, manage seasonal changes, troubleshoot problems, and harvest artichokes at the right time.
1. Understanding the Artichoke Plant


The globe artichoke, botanically known as Cynara cardunculus var. scolymus, is a member of the sunflower family. It is grown primarily for its edible flower buds, although its architectural foliage and striking purple flowers also make it an attractive garden plant.
What makes artichokes different from other vegetables?
Unlike vegetables grown for their roots, leaves, or fruits, artichokes are harvested for their immature flower heads.
Each bud contains overlapping structures called bracts. The tender bases of these bracts and the fleshy heart are the main edible portions.
If a bud remains on the plant, it eventually opens into a large purple flower. This is beautiful to look at, but once the bud develops too far, its eating quality declines.
Artichokes can grow as perennials in suitable climates, producing new shoots and harvests over multiple years. In climates with unsuitable winters or summers, gardeners often grow them as annual crops.
Practical insight: Before planting, decide whether you want artichokes primarily for food, ornamental value, or both. This affects your choice of variety, planting schedule, and whether you should maintain the plant through winter.
2. Best Growing Conditions for Artichokes
Artichokes grow most successfully when their environmental needs are met consistently.
| Growing factor | Recommended conditions |
|---|---|
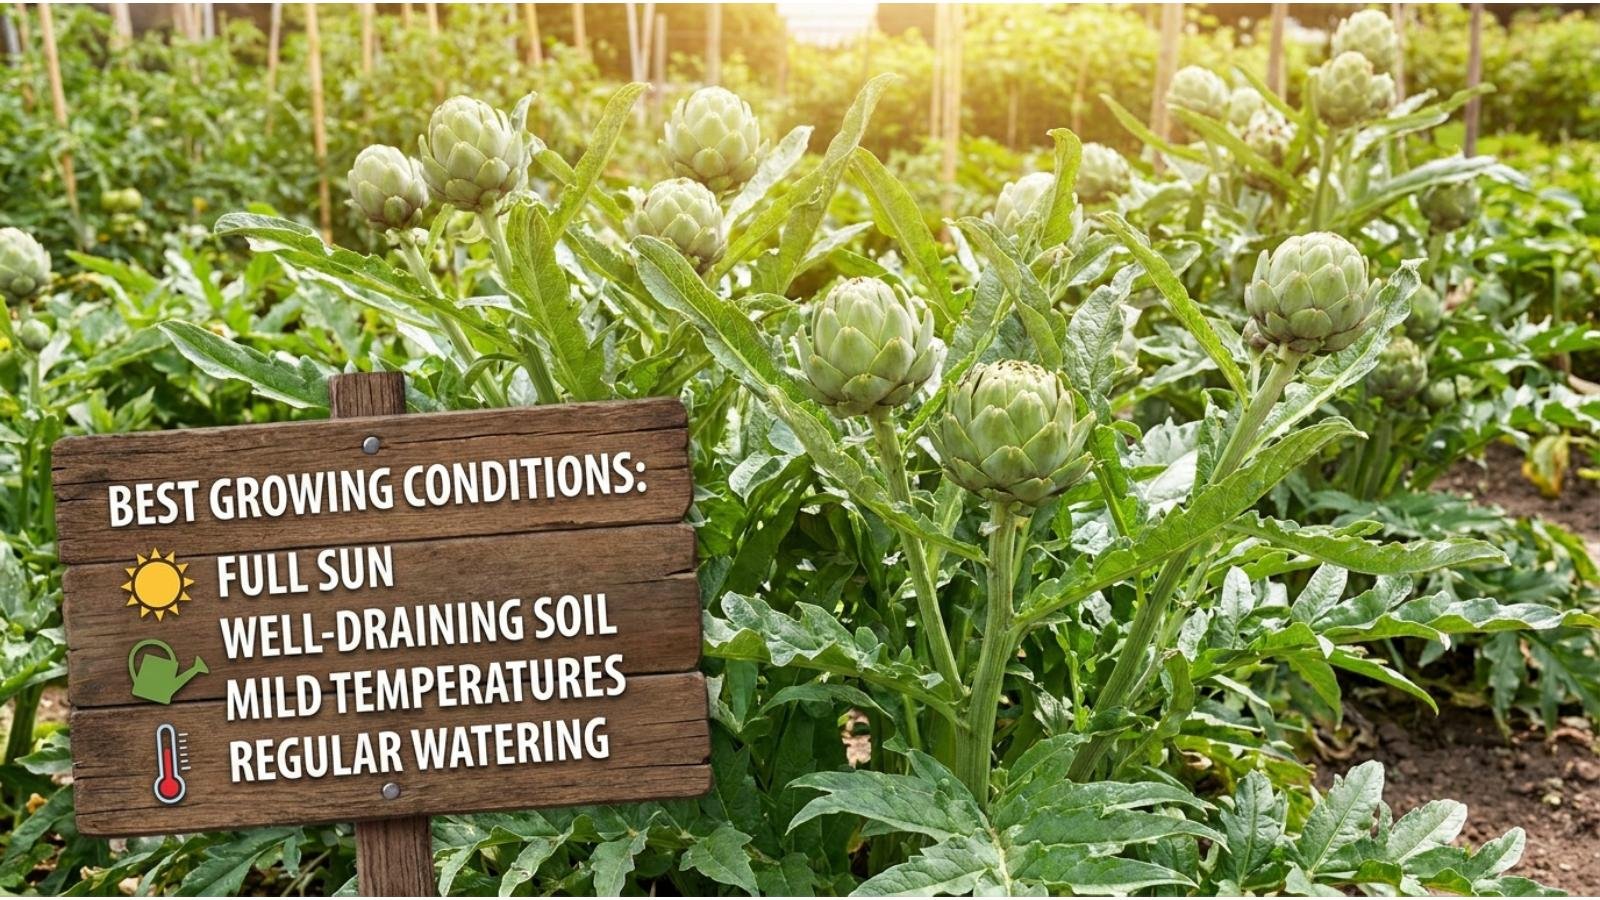
| Sunlight | Full sun, ideally 6–8 hours daily |
| Soil | Fertile, moisture-retentive, well-draining soil |
| Soil pH | Approximately 6.0–6.5 |
| Water | Consistent moisture without waterlogging |
| Temperature | Mild conditions with cool-season growth |
| Spacing | Generally 3–6 feet for mature garden plants |
| Growing habit | Perennial in suitable climates; annual in others |
These are general guidelines. Actual performance depends on the variety, local climate, soil, and growing method.
Sunlight requirements
Artichokes need plenty of sunlight to develop strong foliage and flower buds.
Choose a location that receives at least six hours of direct sunlight daily. Eight hours is a useful target where temperatures are not excessively hot.
Insufficient light can lead to weaker growth and reduced productivity.
However, sunlight requirements should be balanced against climate. In regions with extremely hot summers, afternoon shade may help reduce heat stress, particularly for container-grown plants.
Practical tip: If you are growing artichokes in a hot climate, consider a location with morning sunlight and some protection from intense afternoon heat.
Temperature and climate
Artichokes are cool-season vegetables that generally perform best under mild growing conditions.
Warm temperatures can cause buds to become tougher, looser, or less palatable. Severe cold can damage buds, while prolonged freezing conditions may injure or kill plants.
In climates with mild winters and moderate summers, artichokes can often be maintained as perennials.
In regions with hot summers or harsh winters, growing them as annuals may be more practical.
Important: A plant surviving winter does not automatically mean it will produce well the following season. Temperature, variety, plant maturity, and growing conditions all influence flowering and harvest.
Soil requirements
Artichokes develop large root systems and substantial foliage, so they need fertile soil that holds enough moisture without becoming waterlogged.
Ideal soil should:
- Contain plenty of organic matter.
- Drain excess water efficiently.
- Retain enough moisture between watering sessions.
- Provide room for roots to develop.
- Have a slightly acidic to nearly neutral pH.
Before planting, loosen compacted soil and incorporate mature compost.
If your garden has heavy clay soil, consider creating a raised bed to improve drainage. If the soil is sandy, adding organic matter can help it retain moisture.
Avoid planting artichokes in a low spot where rainwater regularly collects. Poor drainage increases the risk of root problems.
Image suggestion: A soil preparation diagram showing well-draining garden soil, compost incorporation, and a raised bed suitable for artichokes.
3. Choosing the Right Artichoke Variety
Selecting an appropriate variety is particularly important if you want reliable harvests.
Some varieties are better suited to annual cultivation, while others are commonly grown as perennials in climates that support long-term growth.
| Variety | General characteristics | Growing consideration |
|---|---|---|
| Green Globe | Traditional green artichoke with substantial edible buds | Commonly grown as a perennial in suitable climates |
| Imperial Star | Green buds; often used for annual production | Useful when gardeners cannot reliably overwinter plants |
| Emerald | Green-budded variety | Consider local growing conditions and seed or plant availability |
| Violetto di Romagna | Purple-tinged buds | Attractive option for gardeners interested in colorful varieties |
Variety performance varies with climate and cultivation practices, so check the characteristics of the particular seed or transplant you purchase.
Which growing method should you choose?
You can establish artichokes using seeds, nursery transplants, or divisions from mature plants.
Seeds: A useful option when you want to grow several plants or explore different varieties. However, seedlings may vary, and flowering depends on variety and growing conditions.
Nursery transplants: Often a convenient choice for beginners because the plants already have an established start.
Root divisions or offshoots: Useful for propagating a mature plant when you want to maintain its characteristics.
For beginners, a healthy transplant of a variety suited to the local climate can simplify establishment.
4. How to Plant Artichokes Successfully


Correct planting helps artichokes establish strong roots before they need to support large leaves and developing buds.
Step 1: Choose the planting time
Planting time depends on your climate and whether you intend to grow artichokes as annuals or perennials.
In many temperate regions, seeds are started indoors during late winter and seedlings are transplanted in spring.
In mild-winter climates, planting may be more successful in autumn or early spring, depending on local temperatures.
Avoid transplanting during extreme heat or when severe frost is expected.
Step 2: Prepare the planting site
Remove weeds and loosen the soil.
Incorporate mature compost to improve fertility and soil structure. If drainage is poor, create a raised planting area.
Prepare the site before transplanting so that the young roots can enter the surrounding soil easily.
Step 3: Space the plants appropriately
Artichokes become large, spreading plants.
Allow enough room for their mature foliage, airflow, and access during harvesting.
A spacing of approximately 3–6 feet between perennial garden plants is a useful starting point, although variety size and local growing recommendations should guide the final arrangement.
Crowded plants compete for light and nutrients, and dense foliage can make inspection and harvesting more difficult. (UC IPM)
Step 4: Transplant carefully
- Water the seedling before removing it from its container.
- Dig a hole large enough to accommodate the root ball.
- Position the plant at approximately the same depth it was growing previously.
- Backfill with soil and gently firm it around the roots.
- Water thoroughly to settle the soil.
- Add a layer of organic mulch, keeping it away from direct contact with the crown.
Avoid burying the crown deeply or damaging the roots during planting.
Step 5: Help the plant establish
For the first few weeks, monitor soil moisture carefully.
Young plants can struggle if their roots dry out before they become established.
If transplanting into warm weather, temporary protection from intense midday sunlight can reduce stress.
Beginner mistake: Planting artichokes too close together because the seedlings look small. Their mature size is much larger than their initial appearance suggests.
5. Watering Artichoke Plants Correctly
Water management is one of the most important parts of artichoke plant care.
Artichokes need consistent moisture, especially while producing new foliage and developing flower buds. However, their roots can suffer when soil remains saturated.
How often should you water artichokes?
There is no single watering schedule that works for every garden.
As a general starting point, established plants may need approximately 1–2 inches of water per week during active growth, including rainfall.
Plants growing in sandy soil, hot weather, or containers may need more frequent watering. Plants growing in cool weather or moisture-retentive soil may need less.
Use soil moisture rather than the calendar as your main guide. (Utah State University Extension)
The correct watering method
Follow these practices:
- Water deeply enough to moisten the active root zone.
- Check the soil before watering again.
- Water near the base of the plant when practical.
- Avoid repeatedly saturating the crown.
- Increase monitoring during hot, dry, or windy weather.
- Reduce irrigation when the plant is dormant and conditions warrant it.
Drip irrigation can be useful because it delivers water near the roots while keeping much of the foliage dry.
Signs of underwatering
An artichoke plant experiencing water stress may develop:
- Drooping or wilted leaves.
- Slower leaf growth.
- Smaller flower buds.
- Poorly developed or loose buds.
If the soil is dry, water deeply and monitor how the plant responds.
Signs of overwatering
Excessive moisture may contribute to:
- Yellowing foliage.
- Persistently wet soil.
- Weak or declining growth.
- Crown or root rot.
If the soil remains soggy, stop adding water until drainage improves. Check whether the plant is growing in compacted soil or a poorly drained container.
Expert tip: Check soil moisture several inches below the surface rather than relying only on the appearance of the top layer. The surface may look dry while the root zone remains wet.
6. Fertilizing Artichokes for Strong Growth
Artichokes are substantial feeders, particularly during active foliage development.
They benefit from fertile soil and an appropriate supply of nutrients. Nitrogen supports leafy growth, but excessive nitrogen can encourage foliage at the expense of balanced plant development.
Before planting
Incorporate mature compost into the planting area.
If your soil is deficient in particular nutrients, a soil test can help you choose an appropriate fertilizer rather than applying nutrients unnecessarily.
During active growth
Use a balanced vegetable fertilizer or a fertilizer recommended for artichokes in your region.
Follow the product label for application rates and timing.
Some growing guides recommend regular nitrogen applications during establishment and active growth, but the appropriate amount depends on soil fertility, fertilizer formulation, and plant development. (UC IPM)
Fertilizing best practices
- Apply fertilizer to moist soil when appropriate.
- Keep concentrated fertilizer away from direct contact with stems and crowns.
- Water after applying granular fertilizer if the label instructs you to do so.
- Avoid excessive nitrogen, especially when plants are already producing abundant foliage.
- Reduce or stop routine feeding when plants enter dormancy.
Signs your plant may need nutritional attention
Slow growth, pale leaves, or poor development can indicate a nutrient problem, but these symptoms are not proof of fertilizer deficiency.
Before adding more fertilizer, check for:
- Waterlogged or excessively dry soil.
- Poor drainage.
- Root damage.
- Inadequate sunlight.
- Pest or disease problems.
- Soil nutrient deficiencies.
Adding fertilizer to a plant with damaged roots may not solve the underlying problem.
Image suggestion: An infographic illustrating compost incorporation, side-dressing fertilizer, and the correct distance between fertilizer and the artichoke crown.
7. Mulching and Weed Control
Mulching helps maintain soil moisture, suppress weeds, and moderate soil temperature.
Artichokes have substantial foliage, but young plants can still suffer when weeds compete for water, nutrients, and light.
How to mulch artichokes
Apply approximately 2–4 inches of organic mulch, adjusting the amount to the material and local conditions.
Suitable options include:
- Clean straw.
- Shredded leaves.
- Mature compost.
- Other suitable organic garden mulch.
Leave a small gap around the crown to prevent excessive moisture from accumulating directly against the plant’s base.
Why weed control matters
Weeds compete with artichokes for resources, particularly during establishment.
Remove weeds while they are small. Because artichoke roots can be damaged by deep cultivation, avoid aggressive digging close to the plant.
Practical tip: A layer of mulch combined with occasional shallow hand-weeding is often easier on the plant than repeatedly disturbing the soil.
8. Pruning Artichokes and Encouraging New Growth
Pruning requirements depend on whether you are growing artichokes as annuals or perennials.
Pruning after harvest
For annual crops, remove declining foliage and spent stems after the growing season.
For perennial plants, pruning can be part of the process of encouraging a new growth cycle.
In suitable climates, established plants are sometimes cut back after their main harvest period. Irrigation and feeding are then adjusted according to the local growing season and the plant’s dormancy cycle.
The exact timing depends on the climate and production system.
How to prune safely
- Use clean, sharp pruning shears.
- Remove dead, damaged, or diseased leaves.
- Cut spent flower stalks near their base.
- Avoid damaging the central crown.
- Remove diseased plant material from the growing area.
Do not remove large amounts of healthy foliage unnecessarily. Leaves help the plant produce energy for future growth.
Should you remove the flowers?
If your main goal is harvesting edible artichokes, cut buds while they are still firm and immature.
If you want ornamental flowers, allow selected buds to open.
The flowers attract pollinators and provide an additional ornamental benefit, although the opened flower heads are no longer suitable for harvesting as tender vegetables.
9. Seasonal Artichoke Plant Care
Artichoke growth changes with temperature and the time of year.
Understanding these seasonal changes helps you avoid watering, pruning, and feeding at inappropriate times.
| Season | Main care priorities |
|---|---|
| Spring | Encourage new growth, maintain moisture, remove weeds, and feed as needed |
| Summer | Monitor heat stress, maintain appropriate moisture, harvest developing buds, and manage dormancy where applicable |
| Autumn | Support renewed growth in suitable climates, maintain soil fertility, and prepare perennial plants for winter |
| Winter | Protect plants from damaging cold, maintain appropriate drainage, and avoid unnecessary watering during dormancy |
Spring care
As new growth appears, inspect the crown and remove dead material.
Maintain consistent soil moisture and apply fertilizer if the plant is actively growing and needs additional nutrients.
Watch for aphids on young foliage.
Summer care
Summer can be challenging, especially in regions with prolonged heat.
During hot weather:
- Monitor soil moisture more frequently.
- Mulch to reduce moisture loss.
- Protect container roots from excessive heating.
- Harvest buds promptly.
- Watch for signs of heat stress.
In climates where artichokes enter summer dormancy, reduce irrigation as appropriate rather than forcing continuous growth under unsuitable conditions.
Autumn care
In regions with mild autumns, cooler weather may encourage renewed growth.
Remove damaged foliage, manage weeds, and provide nutrients if the plant is actively growing.
Autumn can also be an appropriate planting period in climates where young plants can establish before winter.
Winter care
Artichokes are not equally cold-hardy in every growing environment.
For perennial plants:
- Apply suitable mulch around the root zone.
- Avoid waterlogged winter soil.
- Protect plants from severe cold according to local conditions.
- Remove damaged material when appropriate.
Container plants may need additional protection because their roots are more exposed to temperature fluctuations.
In very cold climates, growing artichokes as annuals may be more practical than attempting to maintain them outdoors through winter.
Image suggestion: A four-panel seasonal illustration showing spring growth, summer bud production, autumn regrowth, and winter protection.
10. Growing Artichokes in Pots and Containers


Artichokes can be grown in containers, but their large mature size makes pot selection especially important.
A small decorative pot may be suitable for a young seedling, but it is generally inadequate for a mature plant.
Choosing a suitable container
Look for a container that:
- Holds a substantial volume of growing medium.
- Has unobstructed drainage holes.
- Provides room for root development.
- Is stable enough to support a large plant.
- Can be moved or protected if necessary.
A large container of approximately 15–25 gallons can be a useful starting point for one plant, although requirements vary by variety and growing conditions.
Some growing guides describe successful container production in smaller containers, but larger volumes generally provide more room for roots and help reduce rapid drying.
Choosing the right potting mix
Use a high-quality, well-draining potting medium.
A suitable mix should retain moisture while allowing excess water to escape.
Avoid filling containers with dense garden soil that may compact and restrict drainage.
Watering container-grown artichokes
Container plants often dry out faster than plants growing in the ground.
Check moisture regularly, especially during hot weather.
Water thoroughly when needed, allowing excess water to drain away.
Do not allow the pot to sit continuously in a tray of standing water.
Fertilizing container plants
Nutrients can be depleted or washed out of containers more quickly than garden soil.
Use a suitable fertilizer according to its label and monitor plant growth.
Avoid excessive feeding, particularly when growth is slow or the plant is dormant.
Common container-growing mistakes
Using a pot that is too small: Restricted roots can limit growth and make moisture management difficult.
Choosing a container without drainage: Water accumulation can damage roots.
Allowing the pot to overheat: Dark containers in intense sunlight may become excessively warm.
Forgetting to water during hot weather: Container plants can experience drought stress surprisingly quickly.
Practical tip: Place the container where the plant receives plenty of sunlight but where you can easily monitor and water it.
11. Common Artichoke Pests and Diseases
Healthy growing conditions are the foundation of pest and disease prevention.
However, artichokes can still experience insect damage, fungal diseases, and environmental stress.


Aphids
Aphids are small, sap-feeding insects that often gather on young leaves and tender growth.
Heavy infestations can weaken plants and cause distorted foliage.
What to do:
- Inspect young leaves regularly.
- Remove small infestations by hand when practical.
- Use a gentle stream of water to dislodge aphids.
- Consider an appropriately labeled insecticidal soap if necessary, following its directions.
Protect beneficial insects and avoid unnecessary broad-spectrum pesticide applications.
Slugs and snails
Slugs and snails may feed on tender foliage, particularly in damp gardens.
Look for irregular holes in leaves and inspect around mulch, pots, and other sheltered areas.
Remove hiding places where practical and hand-pick pests when appropriate.
Avoid keeping the soil surface constantly wet if the plants do not need additional irrigation.
Artichoke plume moth
Artichoke plume moth larvae can damage buds and other plant tissues.
Look for damaged buds, feeding signs, and dark trails associated with larvae.
Remove affected plant material when appropriate and seek locally suitable management advice if the problem persists.
Root rot
Root rot is a serious concern when artichokes grow in poorly drained or persistently saturated soil.
Possible symptoms include yellowing leaves, declining growth, wilting despite wet soil, and eventual plant collapse.
What to do:
- Check whether the soil is staying excessively wet.
- Improve drainage where possible.
- Adjust irrigation.
- Remove severely affected plants when necessary.
- Avoid replanting into a location with unresolved drainage or disease problems.
Not every case of yellowing is root rot, so inspect the entire plant and its growing conditions before deciding on treatment.
Gray mold and other fungal problems
Fungal diseases can develop when conditions favor prolonged moisture and poor airflow.
Remove infected plant material, avoid unnecessary overhead watering, and maintain suitable spacing.
General pest and disease prevention
The following habits can reduce problems:
- Inspect plants at least weekly.
- Remove dead or diseased foliage.
- Avoid overcrowding.
- Water according to soil conditions.
- Keep weeds under control.
- Maintain healthy soil drainage.
- Clean pruning tools when moving between diseased plants.
Aphids, slugs, snails, plume moths, and root or foliage diseases are among the problems documented for artichokes. Correct identification is important because different problems require different management approaches.
12. Troubleshooting Common Artichoke Growing Problems
When an artichoke plant looks unhealthy, avoid immediately adding fertilizer or water.
First, identify the symptoms and examine the growing conditions.
| Problem | Possible causes | What to check or do |
|---|---|---|
| Yellow leaves | Excess moisture, nutrient deficiency, aging leaves, or root problems | Check soil moisture, drainage, and the pattern of yellowing |
| Small flower buds | Heat stress, inadequate water, poor nutrition, or overcrowding | Review watering, sunlight, spacing, and plant health |
| Buds becoming tough | Late harvesting or unsuitable hot conditions | Harvest earlier and review seasonal growing conditions |
| Wilting leaves | Dry soil, damaged roots, or excessive heat | Check soil moisture before watering |
| Slow growth | Poor sunlight, cold conditions, root restriction, or nutrient problems | Review light, temperature, drainage, and fertility |
| Brown or damaged leaves | Heat, frost, pests, disease, or moisture stress | Inspect the affected tissue and recent weather |
| Plant failing to produce buds | Immaturity, unsuitable temperatures, variety, or growing conditions | Review planting date, variety, and seasonal temperature exposure |
| Crown or root decline | Waterlogging, disease, or root damage | Check drainage and inspect the crown and surrounding soil |
These symptoms are not always specific to one cause. For example, yellow leaves can result from either excessive watering or insufficient water, depending on the circumstances.
Why is my artichoke plant growing leaves but no buds?
This is a common frustration for gardeners.
Possible explanations include:
- The plant is still too young.
- The variety is not well suited to the climate.
- The plant has not experienced the conditions needed for flowering.
- Excessive heat is interfering with bud development.
- The plant is growing in insufficient sunlight.
- Nutrient balance is encouraging foliage without satisfactory reproductive growth.
Start by confirming the variety and reviewing its expected growing season.
Do not assume that adding more fertilizer will solve the problem. Excess nitrogen can promote leafy growth without correcting unsuitable temperatures or other environmental limitations.
Why are my artichoke buds opening too early?
Buds may open because they have matured beyond the ideal harvest stage or because environmental conditions are accelerating development.
Inspect the plant regularly as buds enlarge.
Harvest firm buds before their bracts begin to spread apart significantly.
Why is my artichoke plant wilting in wet soil?
Wilting in wet soil can indicate root damage or poor drainage rather than a lack of water.
Adding more water without checking the roots and soil can worsen the situation.
Inspect the growing medium, drainage holes, and crown before deciding how to respond.
13. When and How to Harvest Artichokes


Harvesting at the right time is essential for tender, flavorful artichokes.
The edible portion is the immature flower bud. If you leave it on the plant for too long, the bracts begin to open and the bud becomes less suitable for eating.
When are artichokes ready to harvest?
Look for buds that are:
- Firm and compact.
- Well developed for their variety.
- Still tightly closed.
- Beginning to reach their expected mature size.
A bud around 3 inches or larger may be harvestable, depending on the variety. Size alone is not a reliable indicator, so pay attention to firmness and the spacing of the bracts.
How to harvest artichokes step by step
- Inspect the buds regularly as they develop.
- Choose a firm, mature bud that has not opened significantly.
- Use clean, sharp pruning shears or a suitable knife.
- Cut the stalk several inches below the bud, leaving a short length of stem attached.
- Handle the harvested buds gently to avoid bruising.
- Continue monitoring the plant for smaller side buds.
The main central bud often develops before the smaller lateral buds.
Harvesting the central bud does not necessarily mean the plant has finished producing. Continue checking the plant throughout its productive period.
What happens if you harvest too late?
Overmature buds become tougher and may develop a less desirable flavor and texture.
If a bud has already opened, you can leave it for its ornamental flower display instead of harvesting it for food.
How long does it take to grow artichokes?
The time from planting to harvest varies according to the variety, growing conditions, and whether you begin with seeds, transplants, or divisions.
Some plants can produce buds within a few months under favorable conditions, while perennial production systems may take longer to become fully established.
A general estimate of approximately 100–150 days is sometimes used for artichoke production, but it should not be treated as a guarantee for every variety or climate.
14. Propagating Artichokes
Artichokes can be propagated through seeds or by dividing established plants.
The best method depends on whether you want to grow new varieties or reproduce an existing plant.
Growing artichokes from seeds
Starting from seed gives you access to a wider range of varieties.
To get started:
- Sow seeds in individual pots or seed trays using a suitable seed-starting medium.
- Keep the medium appropriately moist.
- Provide suitable warmth and light for germination and seedling growth.
- Grow seedlings until they are sufficiently established for transplanting.
- Harden them off gradually before moving them outdoors.
Seed-grown plants may differ in their growth and production characteristics, depending on the variety.
Propagating through divisions
Established plants may produce offshoots that can be separated and replanted.
This method can be useful when maintaining a desirable plant.
For best results:
- Choose a healthy, established parent plant.
- Select a suitable rooted offshoot.
- Separate it carefully, preserving as much healthy root tissue as possible.
- Replant promptly in prepared soil.
- Water appropriately while the division establishes.
Avoid dividing weak, diseased, or severely stressed plants.
15. Practical Expert Tips for Better Artichoke Harvests
Small adjustments in routine care can make a meaningful difference to plant health and bud quality.
Tip 1: Prioritize drainage before increasing fertilizer
If your soil remains wet for long periods, improving drainage is usually more important than adding additional nutrients.
Healthy roots are essential for effective nutrient and water uptake.
Tip 2: Monitor buds more frequently as harvest approaches
Artichokes can move beyond their ideal harvest stage if left unattended.
During active bud development, inspect plants every few days rather than waiting for a fixed weekly harvesting day.
Tip 3: Avoid excessive nitrogen
Large leaves may look impressive, but abundant foliage does not guarantee a good harvest.
Use fertilizer according to plant needs, soil conditions, and the product label.
Tip 4: Give plants enough space
Mature artichokes can spread several feet across.
Adequate spacing makes harvesting easier, improves access for inspection, and reduces excessive crowding.
Tip 5: Adjust care to the climate
A watering and pruning schedule that works in a mild coastal climate may not be suitable in a region with intense summer heat or severe winter freezes.
Use local growing seasons to determine planting, pruning, and dormancy management.
Tip 6: Do not mistake dormancy for plant death
Artichokes may slow down or die back under unfavorable seasonal conditions.
Before removing a perennial plant, inspect the crown and consider whether its behavior is consistent with normal dormancy.
However, a soft, rotting crown or extensive root damage may indicate a more serious problem.
Tip 7: Maintain a simple growing record
Record:
- Planting date.
- Variety name.
- Fertilizer applications.
- Major weather conditions.
- First bud appearance.
- Harvest dates.
- Pest or disease symptoms.
These notes help you identify patterns and adjust your care routine over time.
16. Internal Linking Opportunities
For a plant-care website, the following related articles could provide useful next steps for readers:
| Suggested article | Why it is relevant |
|---|---|
| How to Grow Vegetables in Raised Beds | Helps readers improve drainage and organize planting space |
| Composting for Healthy Garden Soil | Explains how organic matter supports soil structure and fertility |
| Vegetable Garden Watering Guide | Provides additional guidance on irrigation and soil moisture |
| How to Identify and Control Aphids | Helps readers recognize and manage a common garden pest |
| Organic Mulching for Vegetable Gardens | Explains how mulch supports moisture retention and weed control |
| How to Grow Perennial Vegetables | Helps readers understand long-term crop management |
| Container Vegetable Gardening for Beginners | Provides guidance for gardeners growing artichokes in pots |
These topics can be linked naturally from the relevant sections of the article.
17. Frequently Asked Questions About Artichoke Plant Care
How much sunlight does an artichoke plant need?
Artichokes generally need at least 6–8 hours of direct sunlight daily for strong growth and productive flowering. In very hot climates, some afternoon shade may help reduce heat stress.
How often should I water my artichoke plant?
Water when the soil begins to dry, keeping the root zone consistently moist without making it waterlogged. Established plants may need approximately 1–2 inches of water weekly during active growth, depending on rainfall, soil type, and temperature.
Are artichoke plants perennials or annuals?
Artichokes are perennials in suitable climates, particularly where winters are relatively mild and summers are not excessively hot. They can also be grown as annuals in regions where seasonal conditions make long-term cultivation difficult.
Can artichokes grow in pots?
Yes. Artichokes can grow in large containers with adequate drainage, fertile potting medium, sufficient sunlight, and regular watering. Choose a container that accommodates the plant’s substantial mature size.
Why is my artichoke plant not producing buds?
Possible causes include an immature plant, unsuitable temperatures, insufficient sunlight, excessive heat, inappropriate variety selection, or unbalanced nutrition. Check the growing conditions before changing your fertilizer routine.
How long does it take for an artichoke plant to produce artichokes?
Under favorable conditions, some varieties may produce harvestable buds within approximately 100–150 days. However, timing varies considerably depending on the variety, climate, planting method, and growing season.
Should I cut back my artichoke plant after harvesting?
Annual plants can generally be cleaned up after their growing season. Established perennial plants may benefit from pruning as part of their seasonal growth cycle. The timing and extent of pruning should depend on the climate and whether the plant is entering dormancy.
Can artichoke plants survive winter?
They can survive winter in suitable climates, but their cold tolerance is limited. Severe or prolonged freezing can damage or kill plants. Mulching and other appropriate winter protection can help in some regions.
Why are my artichoke buds small?
Small buds may result from heat stress, inadequate moisture, poor nutrition, overcrowding, or other growing conditions that limit plant development. Check sunlight, soil moisture, spacing, and the overall health of the plant.
Should I let my artichoke flower?
You can allow selected buds to flower if you want an ornamental display. The flowers are attractive and can provide resources for pollinators. However, buds left to open are no longer suitable for harvesting as tender vegetables.
What is the best fertilizer for artichoke plants?
A suitable balanced vegetable fertilizer or an appropriately formulated fertilizer recommended for artichokes can work well. Choose a product based on soil fertility and follow its application instructions. Avoid excessive nitrogen.
Do artichoke plants need pruning during winter?
Not necessarily. Pruning depends on your climate, growing system, and the condition of the plant. Remove dead or diseased foliage when appropriate, and protect perennial crowns from damaging winter conditions.
Conclusion
Successful artichoke plant care comes down to providing the right growing environment and adjusting your routine as the plant develops.
Start with a sunny location, fertile and well-draining soil, and enough space for mature growth. Maintain consistent moisture without waterlogging the roots, provide nutrients when needed, and monitor plants for pests and disease.
Pay particular attention to temperature because excessive heat and severe cold can interfere with growth and bud production. If you are growing artichokes as perennials, understand their seasonal growth and dormancy patterns before deciding when to prune or reduce watering.
Most importantly, harvest buds while they are still firm and compact, before their bracts open significantly.
With thoughtful planting, consistent care, and timely harvesting, you can enjoy healthy artichoke plants that provide both attractive garden foliage and delicious homegrown vegetables.